
Making Spawn
Making Spawn
Spawn is what we use to inoculate our substrate, whether it’s logs, straw, sawdust blocks, or even coffee grounds and toilet paper! I’m not kidding. Many species of oyster mushrooms will grow on just about anything. Other species are a bit pickier, including Black Pearl oysters. Therefore it’s best to know how to make spawn using a variety of methods.
Grain
Supplies and Equipment
- Jars-any size you have
- Mycology Lids
- Cereal grain, such as rye berry
- Pressure canner
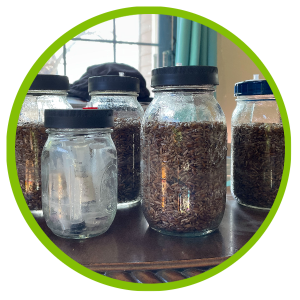 Rye berry is the grain I’ve worked with the most, and it’s readily available from a number of sources. It can get expensive so it pays to shop around. I’ve paid anywhere from $1.50-$3.60 per pound. This is a major consumable and gets used up faster than you’d think! 5 pounds of rye berry usually yields about 5 quarts of spawn. Wheat, millet, sorghum, milo, and corn can also be used. The jars do take some time to fully colonize; mine have taken a few months or more by the quart. Room temperature will affect this; warmer rooms will grow spawn more quickly, while cooler rooms will colonize more slowly. Remember, no one likes to freeze! So heat your grow room accordingly.
Procedure:
Measure out your grain for the amount of spawn you intend, keeping in mind that you’ll soak the grain so it doubles in size. You also won’t fill your jars to the top, both for oxygen and the occasional shake. I’ve found a bit less per more jars is better than having left overs, assuming you have room in your canner. Otherwise, a bit more per jar is fine with about 1 inch of head space minimum. Soak the grain overnight, 12-24 hours. Much more than that and it’ll start to sprout, which you don’t want.
Cook the grain for 15-20 minutes at a boil. You’ll need to dry it out; I find spreading it on large baking trays, then putting it in the oven at 350 for 20-30 minutes works well. Some use screens. You want the grain soaked and expanded so the fungus can more easily digest it. Too much water takes up space and invites contamination, even though it’ll be pressure canned.
Once the grain is reasonably dry, jar it, seal it, and sterilize at 15 PSI for 1 1/2 hours. Lids should be finger tight, just as with any other canning process, or the filters can pop out of the lid. Tighten the lids when you take them out of the canner, and voila! Grain for spawn.
Inoculation of Grain
There are three ways to do this: liquid culture, agar plates, or from other spawn. Using liquid culture is the easiest way, especially if you’re using specialized mycology lids. Just flame the needle until it’s red hot, insert into self-healing port, and depress the plunger. Since I use quart jars and 10 mL syringes, I inject all of it into the jar. However, it’s perfectly acceptable to use as little as 2 mL per jar, especially if you’re using smaller jars. The jars will simply take longer to colonize. The extended timeline also gives contamination a chance to happen. Sadly, contamination can happen even in the best sterilized jars. Trust me. When using grain spawn or agar plate cultures, just open things in your clean space, drop some culture into the fresh grain, and close.
Plug (dowel) spawn
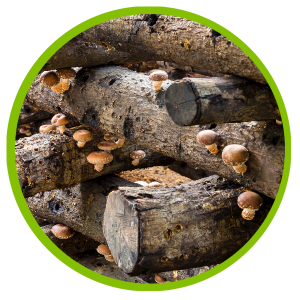 This kind of spawn is used for inoculating logs. Logs are a great way to turn your mushrooms into perennials and collect a harvest year after year. The initial time investment is a bit longer and the harvest less predictable, but some species such as shiitake have been known to yield for 3-5 years or more. The plug spawn makes log inoculation very easy.
Equipment:
- 3/8” hardwood dowels
- Mason jars with mycology lids
- Culture
- Pressure canner
Fill your jars 1/2-3/4 full with dowels, then cover with water to the top of the jar. Soak the dowels in water for 24 hours. Drain the excess water, close the jar back up with the breathable mycology lid, and sterilize at 15 PSI for 45 minutes. While it’s true that you might be able to get away with simply boiling the dowels, I prefer to err on the side of caution. Let the jars cool overnight, then inoculate with grain spawn, agar pieces, or liquid culture. If you use liquid culture and lids with self-healing ports you won’t need to use your still air box. Otherwise, work inside your clean environment. Open your jars/plates, drop some culture in with the dowels, and close. Make sure your culture is in contact with your dowels, otherwise the inoculation won’t take. Plug spawn will last up to six months in the refrigerator although it’s better to use it ASAP.
Please refer to the Contamination lesson for specific instructions on how to clean a still air box, if required.